I think most of us have a stash of vintage linens that have seen better days. I have bunches of hand embroidered pillow cases, stained table cloths, ripped aprons, etc., that have been waiting in a repurposing pile for ages. Most of them have some holes and stains, but with this project it's easy just to cut around the blemishes. These are great for hanging lingerie or clothing with thin straps.
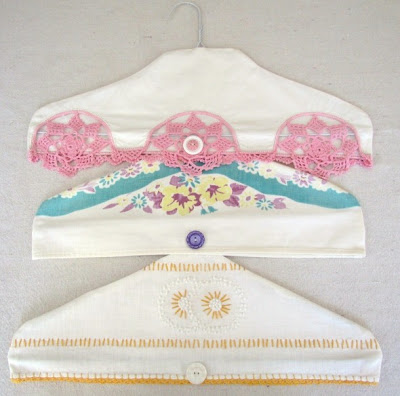
The top hanger was made from a pillow case, the other two were made from table cloths. The ready-made finished edges make them perfect candidates for these hanger covers.
These are real quick and easy to make. I think it took me longer to dig out my sewing machine from the back of the closet, dust it off, set it up, and hunt for some white thread. Oh well, off white would have to do. Can you tell how often I sew?
I like using white wire hangers for these. Vintage wood hangers or plastic would work also, but I like using wire because they're thin and don't look bulky under the covers. I can hear Faye Dunaway from Mommie Dearest screaming "No wire hangers!" The last time I made up a batch of these, I couldn't find wire hangers anywhere. I went to the cleaners prepared to pay for some, but they just gave them to me....25 of them.
This pillow case has a few tiny holes, but not in the area I'll be using....
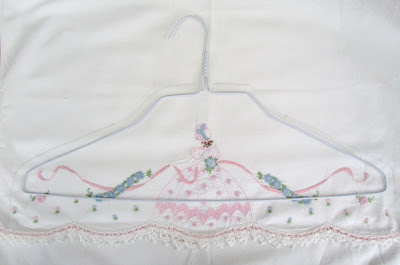
After lining up the scalloped edges, lay your hanger on top of both layers of the pillow case. Center the hanger on the design and leave a few inches below the bottom of the hanger. This way the pretty scalloped edge will be plenty long enough to cover the bottom of the hanger.
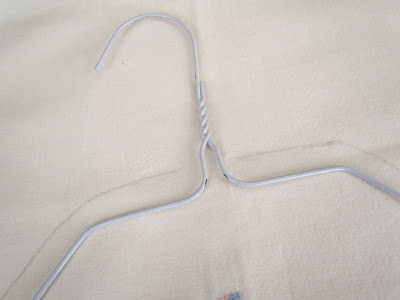
I used a pencil to outline the shape of the hanger adding about 5/8" for the seam allowance.
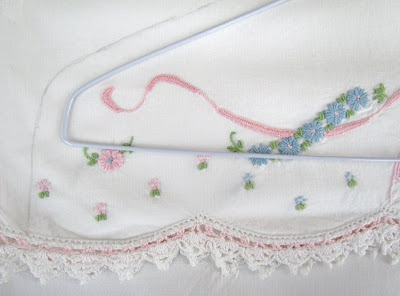
You'll need to mark all the way down to the edge. I usually flair it out slightly at the bottom; it just seems to fit better after it's finished. If you're making several of these at one time, be sure to outline each one with the actual hanger you'll be using. The first time I made some of these, I used just one hanger as a pattern for all of them. Even though the hangers looked to be about the same size, they varied as much as an inch in length....I had several covers that wouldn't fit over the hangers:(
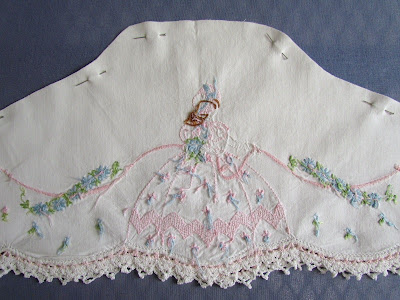
After cutting out your pieces, pin them together with the right sides together.
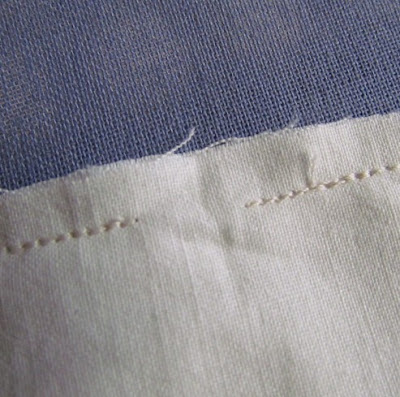
Sew together leaving a 1/2" opening in the top for the hanger to fit through.
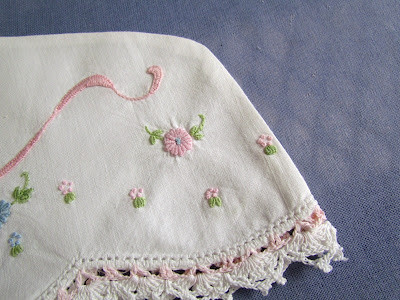
Turn right sides out and press. I don't even bother with clipping the seams.
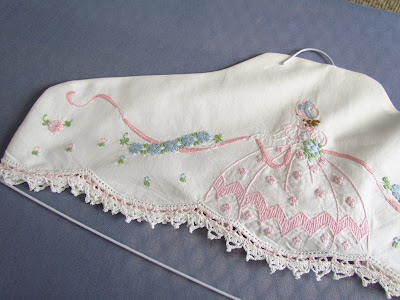
Slip the hanger inside....
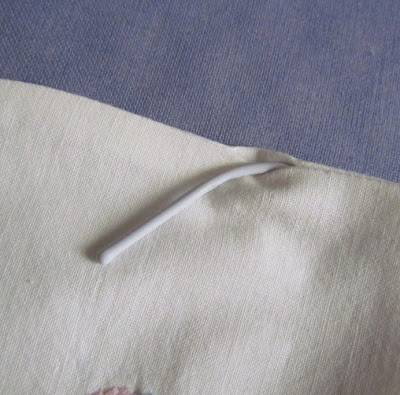
Poke the hanger through the hole in the top....
Presto!!
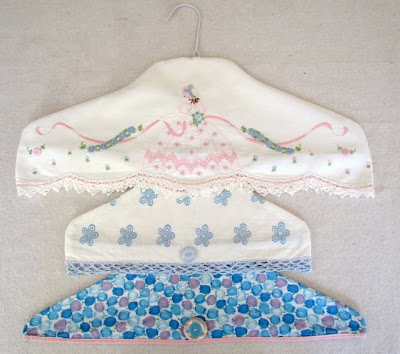
The center hanger was also made from a pillow case, but I used a child's hanger. The one on the bottom was made from a vintage apron. It's hard to see, but there's a pink border on the edge.
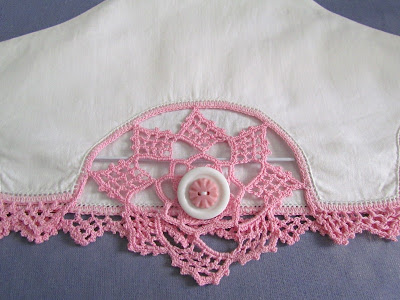
You can finish them off by sewing on a few buttons. Oops. Don't like that hanger showing; I should have left more room at the bottom.
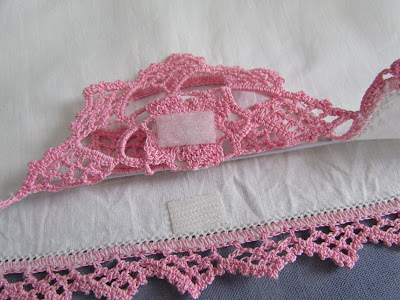
After sewing on the buttons, I used some self adhesive Velcro for the closure.
For my latest batch of pillow case hanger covers from Sept. 2013 click here.
I'm linking up my vintage linen hanger covers with:
My Repurposed Life for Catch as Catch Can,
The Answer is Chocolate for BFF Open House Party,
Under the Table and Dreaming for Sunday Showcase Party,
Keeping it Simple for Motivate Me Monday,
Brambleberry Cottage for Time Travel Thursday.


b.jpg)
b.jpg)


They are so pretty...and simple. I might have to dust off my sewing machine!
ReplyDeleteTelling you this is brilliant seems like an understatement!Super idea and ever so pretty.Thanks for sharing!
ReplyDeletePretty and a good way to repurpose the old linens.
ReplyDeleteSuch a beautiful way to re-use old linens, especially those only-one-of-a-pair pillowcases that we all seem to have! Lovely job, as always!!!
ReplyDeleteA great way to use those pretty old linens. I have a stack of those in my airing cupboard.Thanks for the tutorial, a great inspiration.
ReplyDeleteHow awesome is that! You don't cease to amaze me with your super cool ideas. Vintage linens... one more thing to start collecting... oh boy.
ReplyDeleteGreat results! I made a few of these several years ago and really should do it again. You are so right that they are fun to make and a great use of "cutters"!
ReplyDeleteOh those are so sweet Betsy! You think of everything.
ReplyDeleteI had to laugh at your sewing machine post from the yard sale and your laugh and then sending your hubby out to get it LOL You sound like me !
I love these. Such a great idea for those linens sitting in my closet. I have saved them for the memories but I could see them everyday if I made some of these.
ReplyDeleteThanks for the lovely idea.
These turned out so beautiful. What a wonderful idea....thanks for sharing.
ReplyDeletesmiles...Tammy
Betsy - these so so lovely!!! A fantastic idea too! :)
ReplyDelete-pamela
mybooth96.blogspot.com
great idea! i received a stash of vintage linens and wasn't quite sure what to do with them. these are sweet!
ReplyDeletejudi
I LOVE THIS! I have so many hunks and pieces of old linen. I am going to book mark this one...The best compliment a blogger gets! I bet these would sell well in my booth. Thanks for the tip on doing each hanger individually! You're a genius
ReplyDeleteCarol
Betsy, These are so adorable! Now I have to go through my stash of vintage linens.
ReplyDeletexo,
Sherry
This is such a beautiful idea! I love pretty hangers for my delicate clothes but I don't know if I could hide this covers! ♥
ReplyDeleteFabulous idea and fabulously simple, thanks!
ReplyDeleteHi Betsy! This is a great craft. These beautiful garments also make discolored or ugly hangers still usable. In one way or another, the clothes we hang can also be protected from possible marks, stains and disformation from the hanger. This is a craft that combines aesthetics and functionality. I love it. :)
ReplyDeleteWow, Betsy, these are fabulous! Thank you so much for sharing!!
ReplyDeletexxoo
Swooning!
ReplyDeleteThank you for sharing this!
They're so beautiful! I'd love a closetful of them!
ReplyDeletexoxo
Kathleen
These are beautiful!
ReplyDeleteWhat a beautiful idea, Betsy. I rescue all the affordable old linen I can find. That is something new I can do with a lot of it. Thanks, and Blessings.
ReplyDeleteThis is such a awesome out of the box idea! The best I came across so far! thanks for your sweet comment on my post!
ReplyDeleteHi Betsy, I just wanted to let you know that I received the Marie necklace, OMG, it is just beautiful. I love the size, I thought it was smaller. I am just thrilled. I love your beautiful hangers. I have two pillow cases that my Grandmother did and have always wanted to do something with them. Thank you so much for the tutorial. Have a wonderful weekend and thanks again. Hugs, Terri
ReplyDeleteOoooo!
ReplyDeleteWhat a neat-o idea!
I know I have some old...ah...."slightly" damaged linens stashed away somewhere....
If I ever get back to Deadwood again to look for them........
I love your blog! The covered hangers are beautiful!
ReplyDeleteI used to love my grandmother's hangers like this! Yours are just too cute! I once had a similarly covered hanger that had clothes pins sewn onto the bottom- I used to hang my pantyhose from them after I laundered them! LOL
ReplyDeleteWhat a wonderful idea. I have several pieces from my late Mother In Law and her mother that I couldn't let the family give away. I've wanted to make something for my sis in law and niece and these are wonderful ideas. Thanks for sharing at this week's BFF link party!
ReplyDeleteLovin' this idea! I have tons from my Grandmother and Mom that have small holes or stains. This is awesome!
ReplyDelete*hugs*deb
Such a pretty use for old linens!
ReplyDeleteThank you for sharing.
LOVE this! What a great way to use those vintage linens once they've 'seen better days'! LOL . . . my hubby and I still will use that line "NO WIRE HANGERS!" when one of us gets lazy and leaves junky ones in the closet!
ReplyDeleteThese are all so pretty, I have a vintage one I had picked up last year and have plans to cover some wooden hangers myself, Thanks for the inspiration!
ReplyDeletehugs Lynn
Oh my...I LOVE your idea...they look outstanding...thanks so much for sharing with all of us.
ReplyDeleteBlessings,
Linda
Love this!!! I always see delectable old pillowcases at thrift stores but never knew what to do with 'em. This looks so simple and the result is truly gorgeous.
ReplyDeleteThis is SUCH a great idea! Thank you for taking the time to teach us how to do it. It is a project that will help me get some old (but cute/pretty) old linens out of the attic so they can be enjoyed again.
ReplyDeleteBetsy, what an inventive idea. I always love it when I see something for the 1st time in blog land!!
ReplyDeletexoxo
Karena
Art by Karena
Do come and enter my Giveaway from Dr Perricone!! It is very exciting!
Oh my, these are so beautiful!
ReplyDeleteBrenda
Your hanger covers turned out lovely. And they do look so simple to make. I have stashes upon stashes of linens and have a project like this on my TO-DO list...along with a thousand other things. Maybe one day soon, I'll find the time (INITIATIVE) to make some pretty hanger covers, as well. lol
ReplyDeleteBlessings,
Liz @ the Brambleberry Cottage
http://thebrambleberrycottage.blogspot.com/
Just found this great post today. I have scads of old vintage items that could be done into hanger covers. Would make great gifts for some of my "vintage" minded friends! Thanks for sharing this great idea!
ReplyDeleteI think these hangers are too sweet!
ReplyDeletegreat job, super tute!
gail
ps catching you this week.
BETZZZ,
ReplyDeleteWOW! SUCH A GREAT IDEA! I WAS JUST GOING THRU MY LINENS YESTERDAY AND FOUND SEVERAL FLAWED PILLOW CASES.
NOW I KNOW WHAT TO DO WITH THEM!
LOVE YOU,
ILTZZZZZZZ
Betsy, Hi again - Just wanted to tell you that I made 4 of these yesterday afternoon. They are so cute and mine turned out great, too! I think I'm going to use them for some gifts this Christmas! I've got many more to make. They were a snap to do! Thanks for this tutorial!
ReplyDeleteDon't you just love vintage textiles. I just made a hanger like yours and posted to my blog.
ReplyDeleteWhat an ADORABLE idea for repurposing those old, holey pillowcases and sheets! Thanks for the wonderful tutorial! Being a fellow non-sewer, I think I can do this!! lol! :)
ReplyDeletexoxo laurie
Gotta love these. Great tute.
ReplyDeleteWhat a fun and creative idea...as usual!
ReplyDeleteThese are my Christmas gifts this year. Thank you for the tutorial. Can't wait to get started!!
ReplyDelete